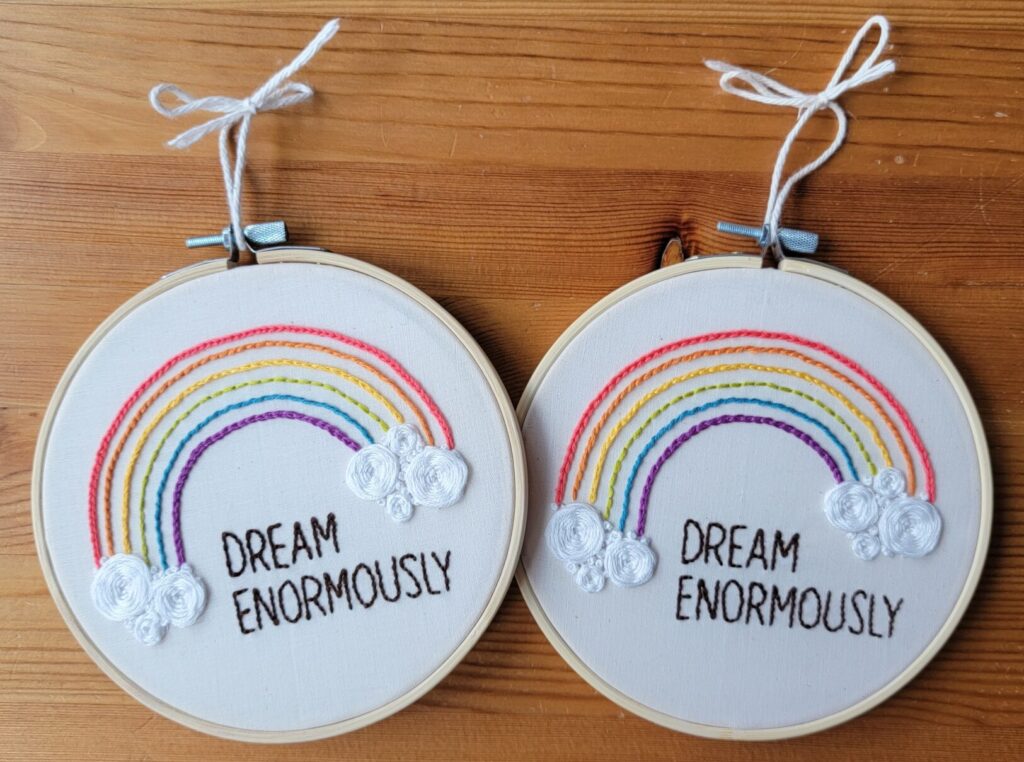
I did it! I FINALLY finished a project! Like all the way finished! Completed AND hung on the wall. If you remember, at the end of 2021, I said I was going to craft my way through 2022.
My first project of 2022 was the Dream Enormously embroidery kit from Nel & Jo Crafts.
Backstory to my Embroidery Adventure
When I first came across Ashley’s Etsy shop in the spring of 2021 (thanks to Michelle’s Money Makers), I thought “oh, I’ve done embroidery. I can do this. No problem.” I purchased four of her snowflake ornament kits (3 for gifts) and a Christmas Gnome ornament kit. It wasn’t until I received the kits that I realized that I had never embroidered. I had cross stitched and cross stitch does not equal embroidery.
Cross Stitch vs Embroidery
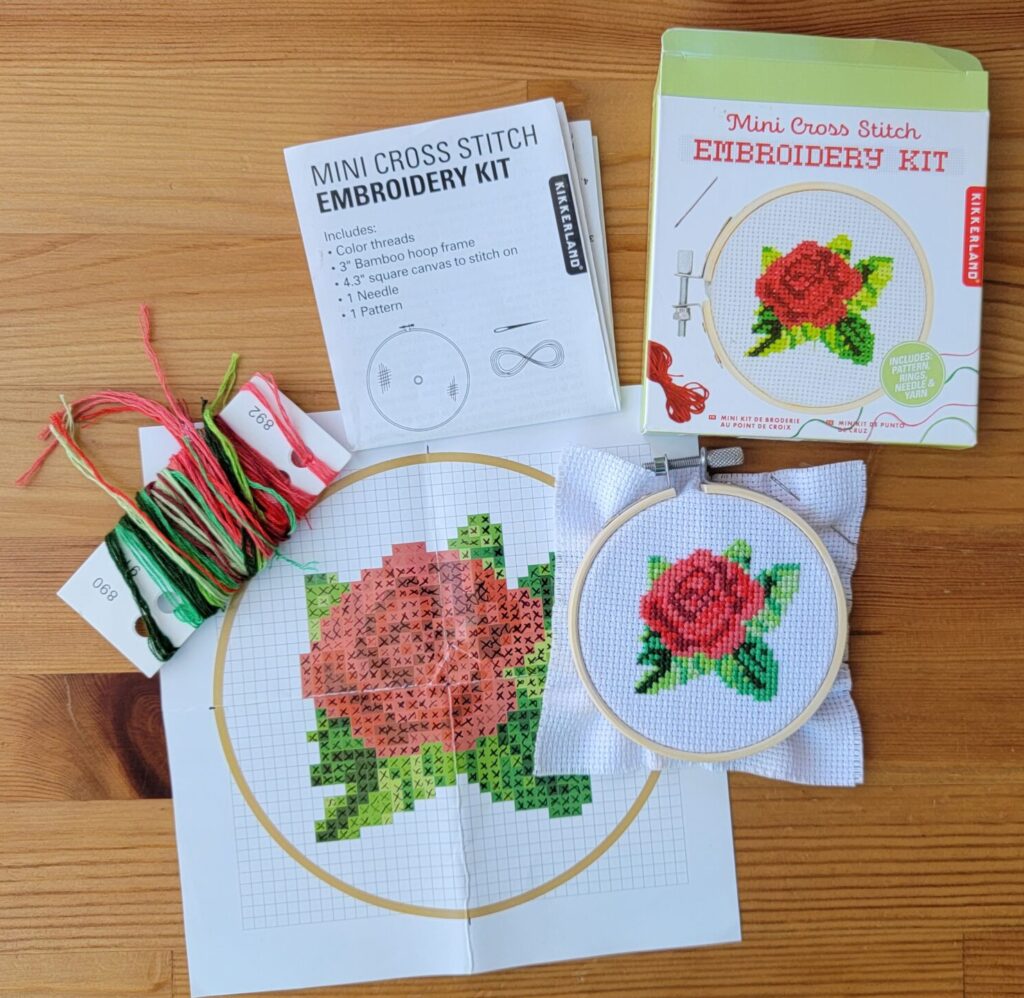
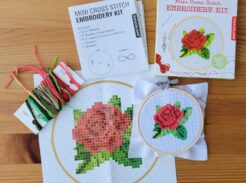
Cross stitch is on an open weave, even-weave material (almost looks like mesh). It uses X stitches and a tiled pattern to create an image. Like this cross stitch rose that I started in Spring 2021 and finally completed in 2022. Embroidery is on quilter’s cotton fabric (like the kind you find at Jo-Anns). There are many types of stitches and I had to draw the pattern on myself. I was intimidated.
Because of this fear, I waited four months after purchasing the kit, to start the snowflake ornaments. What caused me to finally start? The time pressure to get the projects done if I wanted to give the completed snowflake ornaments away for Christmas. I finally told myself to just start and if they look terrible, I don’t have to give them as gifts.
They worked up quickly. I gave 3 of them away as gifts and enjoyed the project enough to make more for Christmas 2022. I love that I can do a couple of stitches based on the amount of time that I have whether it’s 3 stitches in the school pick up line or a marathon of stitches in the evening after the kids go to bed.
Back to the Dream Enormously embroidery kits…
Purchasing
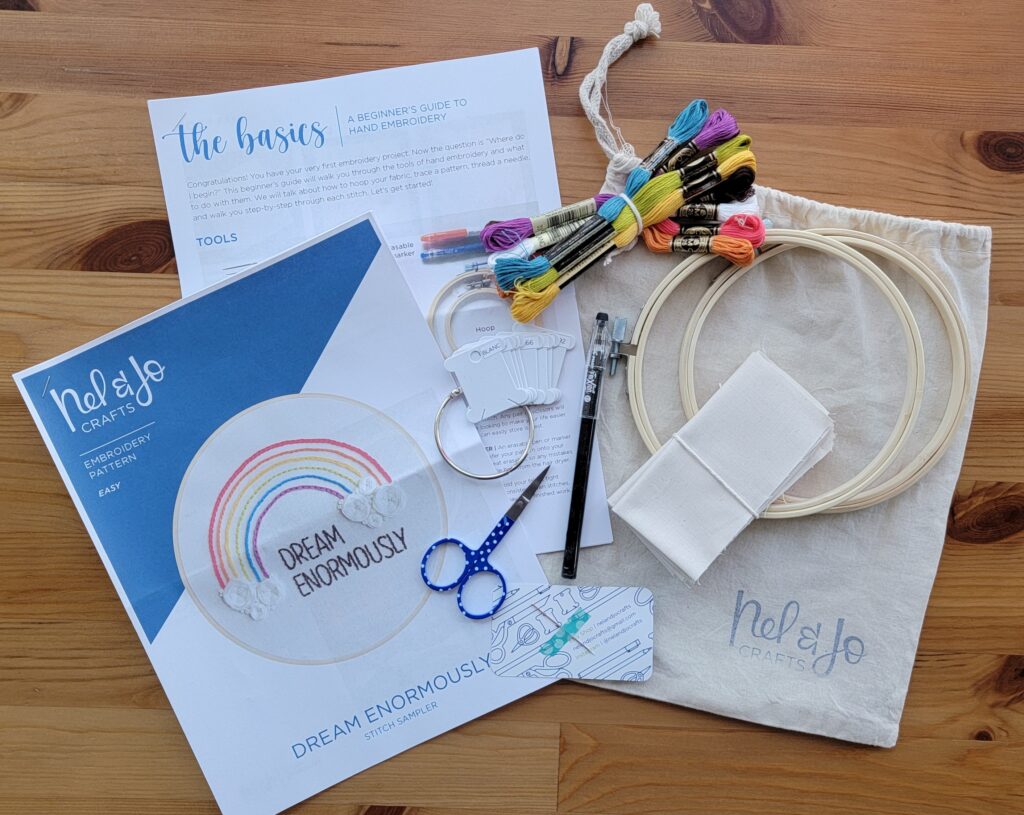
When I first found Nel & Jo Crafts, you could get the pattern for free by joining her email list. I did that and using the included materials list, tried to piece together the items needed for the project. To be honest, it was a little overwhelming. I ended up ordering the kit from Ashley’s Etsy shop. So. Much. Easier. She put together everything I would need and since I wanted to make two (one for each of my daughters), she put together a special listing just for me. Talk about customer service! I had all the materials I needed to make both embroidery projects and no running back to the craft store because I forgot something. Sadly, this exact kit has been discontinued but the pattern is still available in her Etsy shop. Ashley has also revamped her beginner stitch sampler project with the Be Kind embroidery kit.
Actually starting the project
I mostly worked on the two embroidery projects in the car either waiting at school pick up or for the bus to pick up or drop off my daughter for school. Sometimes it was only a couple of minutes and sometimes it was 15 minutes (depending on how early I was). I only had a couple of times I worked on it for more than 15 minutes. While I love being able to use these spare moments, it also made it difficult to pick back up and remember where I was and get into it.
I stitched the 2 hoops simultaneously working one color on one hoop and then the same color on the second hoop. I liked this method as I switched colors less. The pattern has each stripe of the rainbow as a different stitch. This is a great way to learn different stitches. I quickly learned which stitches I loved and which I didn’t love as much. All in all, the stripes of the rainbow worked up very quickly. The clouds took a little bit and because I made mine a little too puffy, I had to use some of the leftover white floss from the snowflakes I made before Christmas to finish the clouds.
Then the letters. I did not like stitching the letters. Maybe it was because I had just finished the clouds and was worried about running out of the floss but trying to use the least amount of floss to stitch the letters was kind of stressful and it made the whole process very slow. I would have benefited with a marathon stitch session to just get the letters done.
Finishing off the hoops
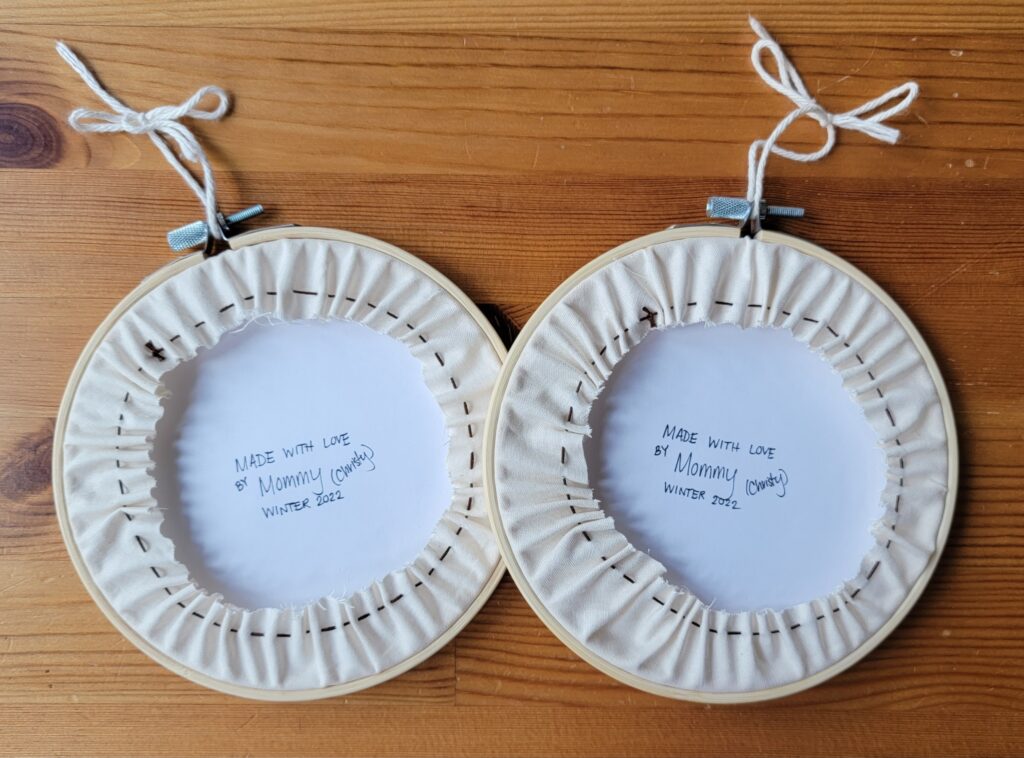
I chose to finish off the embroidery hoops with a piece of paper to cover the back of the stitching and then stitched the back together. I included a note on each piece of paper that says: “Made with Love by Mommy (Christy) Winter 2022”.
Future Embroidery Projects
I love the portability of embroidery projects (and the bag included with kits from Nel & Jo crafts help so much!!). I think I will always have an embroidery project going to work on during my fringe time. I’ve built my confidence in completing these projects and have no problem working on them in public. I actually had a couple of young girls approach me while working on my snowflakes this past December wondering what I was doing.
Leave A Comment